Network Configuration sub-menu
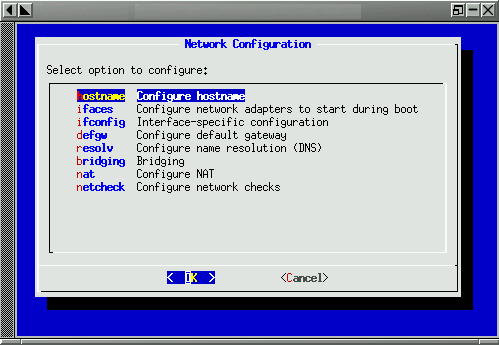
Configure hostname - by default the hostname is "wisprouter". Use this option to change it.
Configure network adapters to start during boot - by default only eth0 and netcs0 are activated during boot. Use this menu if you want to active other adapters as well.
Interface-specific configuration - leads to a sub-menu where you can configure network parameters of individual interfaces.
Default gateway - you change your default gateway using this option.
Configure name resolutions - configure DNS settings of your router using this option. Many functions will be slowed down if the DNS is not correctly configured.
Bridging - leads to bridging configuration. There can be two types of bridges: layer 3 and layer 2. Layer 3 bridges can only bridge IP packets (so, no DHCP), however it works on all kinds of wireless devices. Layer 2 bridge can bridge any type of Ethernet packets, however, it is not supported on wireless cards in non-AP mode. Note that Layer 3 bridging requires that you have IP addresses on all of your interfaces and a default gateway configured on your router.
Configure NAT - NAT stands for Network Address Translation, and is also known as "Masquerading". It allows for several computers with private IP address (10.x.x.x, 192.168.x.x, 172.16.x.x) to use a single public Internet IP address to go the Internet. You will be asked for an Interface which is used to access the Internet. IP address from this interface will be used for NAT.
Configure network checks - WISP-Dist has a service which can ping a set of defined IP addresses. If some of them are unreachable, the unit will reboot. This is useful when hardware is not very stable.
Interface-specific configuration sub-menu
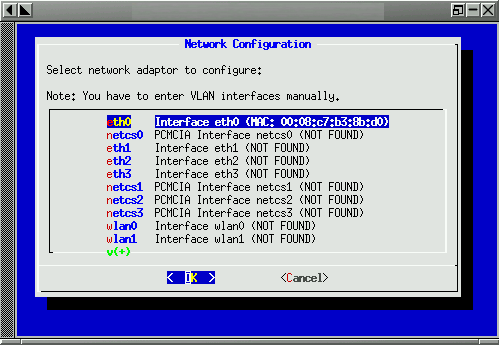
This menu gives you ability to configure various network parameters of individual network interfaces. Select an interface from a list and press ENTER. You will get a network interface configuration screen.

IP Address/Netmask - use this option to assign an IP address to an interface. The IP address are specified by a.b.c.d/masklen form, e.g. 192.168.1.1 means IP address of 192.168.1.1 with netmask 255.255.255.0. More than one IP address can be assigned, to do this enter several IP addresses/masklen pairs separated by space. E.g.: 192.168.1.1/24 10.200.200.1/24
Transmit Rate / Traffic Shaping - use this menu to limit the maximum speed with which the data will be going out from this interface.